How to Prepare Your HVAC for Cooling in 5 Easy Steps

## Is Your AC Ready for Summer? A Quick Guide to Spring HVAC Prep
Preparing your HVAC for the transition to cooling is one of the most important things you can do as a homeowner before warm weather hits Thornton, CO. Skip this step, and your system could be working 10–20% harder than it needs to — driving up your energy bills and risking a breakdown on the hottest day of the year.
Here's a quick overview of what the process involves:
1. Replace or inspect your air filter — check it against a light source; if you can't see through it, swap it out 2. Clear your outdoor condenser unit — remove debris and ensure at least 2 feet of clearance around the unit 3. Check vents and seal air leaks — make sure supply registers are open and ducts aren't losing conditioned air 4. Test your thermostat — switch to Cool mode, wait 5 minutes, then run the system for 15–20 minutes 5. Schedule a professional tune-up — have a technician check refrigerant levels, electrical connections, and coils
Spring is the ideal time to handle this. Demand on your system is low, temperatures are mild, and any issues can be caught before you actually need cool air. Waiting until the first heat wave means longer waits for service and more stress on components that have been sitting idle all winter.
In the sections below, we'll walk you through each of these steps in detail — what to do yourself, what to leave to a pro, and what warning signs to watch for along the way.
Discover more about preparing your hvac for the transition to cooling:
- spring ac tune up what to expect - spring air filter replacement guide - why spring is the best time for hvac maintenance
Preparing Your HVAC for the Transition to Cooling: Why It Matters
As we move into May 2026, Colorado homeowners are experiencing the classic spring dance of wild temperature swings. Here in the Denver metro area, it is not uncommon to see a 40-to-50-degree temperature drop or spike in a single day. This rapid thermal cycling puts incredible stress on your heating and cooling equipment.
Think of your HVAC system like an athlete. You wouldn’t expect a runner to jump straight into a marathon after sitting on the couch all winter without warming up first. Similarly, your air conditioner has been sitting idle for months, collecting dust, while your furnace did the heavy lifting. Flipping the switch to "cool" on the first 90-degree day without any preparation is a recipe for a system freeze-up or a blown capacitor.
Taking the time for proactive preparation offers several major benefits:
- Keeps Energy Bills Under Control: A system that hasn't been prepped often works 10% to 20% harder than necessary. By cleaning components and replacing filters, you can reduce your cooling energy consumption by up to 15%. - Protects Your System's Lifespan: When parts are dirty or restricted, the compressor and blower motor must work overtime. Over time, this extra friction and heat lead to premature component failure, meaning you'll be replacing your system years earlier than expected. - Improves Indoor Air Quality (IAQ): During the winter, dust, pet dander, and pollen settle inside your ductwork and on your system's internal components. Cleaning and preparing your system prevents these allergens from being blasted into your living spaces when the AC kicks on. - Maintains Manufacturer Warranties: Many major HVAC brands require proof of regular, professional seasonal maintenance to keep your warranty valid.
By understanding Why Spring is the Best Time for HVAC Maintenance, you can take control of your home comfort. Investing a little time in spring prep ensures your system operates at peak performance, keeping your home comfortable without draining your wallet. For more tips on maximizing your system's output, check out our guide on Energy Efficient HVAC.
5 Essential Steps to Transition Your HVAC System
Transitioning your HVAC system from winter heating to summer cooling doesn't have to be overwhelming. By breaking the process down into manageable steps, you can safely perform essential DIY maintenance while identifying when it's time to call in our professional team.
To help you stay organized, we recommend referencing our comprehensive Spring HVAC Maintenance Checklist. Below, we break down the five crucial steps to ensure a flawless seasonal transition.
The Role of Air Filters in Preparing Your HVAC for the Transition to Cooling
The humble air filter is your system's primary line of defense. Its job is to capture airborne particles before they can coat your air conditioner's sensitive evaporator coils. When an air filter becomes clogged with winter dust and spring pollen, it restricts airflow. This lack of airflow causes the temperature of the evaporator coil to drop below freezing, leading to a completely frozen AC system and potential compressor damage.
For a successful transition, we recommend checking your air filter monthly, especially during high-pollen spring days.
- The Light Test: To determine if your filter needs to be replaced, slide it out and hold it up to a bright light source. If you cannot see light passing through the fibers, the filter is loaded with debris and must be replaced. - Choosing the Right MERV Rating: Minimum Efficiency Reporting Value (MERV) ratings measure how effectively a filter traps particles. For standard residential use, a MERV rating between 8 and 11 is ideal. While higher MERV ratings (10 to 13) are excellent for severe allergy sufferers, they have a tighter weave that can restrict airflow if your specific system isn't designed to handle them. - Pro Tip: Always write the replacement date on the cardboard frame of your new filter. This simple step takes the guesswork out of your maintenance schedule. Air filters should be replaced every 30 to 90 days, depending on your household size, local dust levels, and whether you have pets.
To dive deeper into preparing your indoor components, take a look at our article on How to Prepare Your AC for Summer.
Step 2: Clearing and Cleaning the Outdoor Condenser Unit
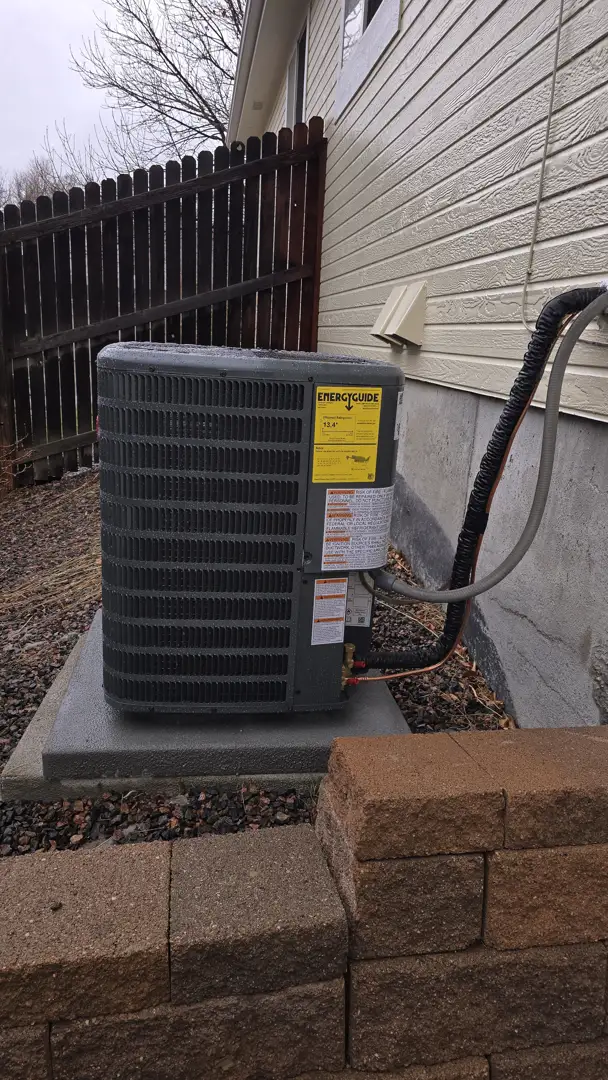
Your outdoor condenser unit is responsible for releasing the heat extracted from inside your home. Over the autumn and winter months, dead leaves, twigs, grass clippings, and dirt accumulate around and inside this unit. If this debris block is left untouched, it suffocates the system, preventing proper heat transfer.
To prepare your outdoor condenser, follow these steps:
1. Turn Off the Power: For safety, locate the outdoor electrical disconnect box near the unit and pull the plug or flip the switch to "off." 2. Clear the Perimeter: Remove any winter covers. Clear away leaves, weeds, and branches. Maintain at least two feet of open space all around the unit to ensure unrestricted airflow. 3. Clean the Exterior Gently: Sweep away loose debris from the metal grates. Use a low-pressure garden hose to gently rinse the condenser coils from the inside out. Never use a power washer, as the high pressure will easily bend the delicate aluminum condenser fins. 4. Inspect the Fins: If you notice any bent metal fins, you can use a specialized fin comb or a flathead screwdriver to very gently straighten them, ensuring optimal airflow.
Step 3: Checking Vents and Sealing Air Leaks
Once the main equipment is clean, it’s time to focus on how that cold air travels through your home.
First, walk through your house and inspect all supply registers and return vents. Make sure they are completely unobstructed by furniture, drapes, or toys. A common misconception is that closing vents in unused rooms saves money. In reality, modern HVAC systems are designed to operate with a specific balance of pressure. Closing vents increases the pressure inside your ductwork, forcing the blower motor to work harder and potentially causing the system to short cycle. We recommend keeping at least 80% of your supply registers open at all times.
Next, consider your ductwork and home sealing. Leaky or damaged ducts can waste up to 30% of conditioned air before it ever reaches your living spaces. If you have access to visible ductwork in your basement or attic, look for obvious gaps or disconnected sections.
Additionally, check your attic insulation. In Northglenn and Thornton homes, insulation should sit well above the floor joists to prevent heat from radiating downward into your living space. Seal any visible air leaks around windows and doors using fresh weatherstripping or caulk to keep the hot summer air outside where it belongs.
Step 4: Testing Your Thermostat and System Functionality
Before the first blistering summer afternoon arrives, you need to perform a dry run of your cooling system. This allows you to catch any technical glitches early when technician schedules are still flexible.
To test your system safely, follow this specific sequence:
1. The 5-Minute Rule: If your system was just running the heat, turn the thermostat to "Off" and wait at least 5 minutes. This allows the refrigerant pressures within the system to safely equalize, protecting the compressor from extreme electrical strain. 2. Switch the Mode: Change your thermostat setting from "Heat" to "Cool." If you have a programmable or smart thermostat, adjust your cooling schedule for the upcoming season. 3. Set the Temp: Lower the thermostat setting to about 3 to 4 degrees below the current indoor room temperature. 4. Monitor the Run: Walk outside to verify that the outdoor fan is spinning and blowing warm air upward. Back inside, let the system run for 15 to 20 minutes. Feel the air coming from your vents—it should feel consistently cool and crisp.
Professional Maintenance for Preparing Your HVAC for the Transition to Cooling
While DIY steps are fantastic for maintaining efficiency, there are critical technical tasks that only a certified professional should perform.
During a professional spring tune-up, a technician will inspect your system's electrical connections, test the capacitors (which start the motor), clear the condensate drain line to prevent water damage, and measure refrigerant levels. Handling refrigerant requires specialized EPA certification, specialized gauges, and an understanding of pressure-temperature relationships. Running a system with low refrigerant will destroy the compressor, which is one of the most expensive components to replace.
Scheduling this service in early spring ensures you avoid the summer rush. Learn more about what our team does during this visit by reading Spring AC Tune-Up What to Expect.
Whether you need Air Conditioning Maintenance Denver CO, an Air Conditioning Tune-Up Arvada CO, or trusted Air Conditioning Service Longmont CO, our local, family-owned team is ready to assist.
Common Issues to Watch For During the Spring Transition
When you run your air conditioner for the first time in May 2026, pay close attention to how it behaves. Catching minor performance issues early prevents them from escalating into costly emergency repairs.
Watch out for these common warning signs:
- Uneven Cooling: If some rooms feel like an icebox while others remain stuffy and warm, you could be dealing with duct leaks, unbalanced registers, or a failing blower motor. - Weak Airflow: If you can barely feel air coming out of the registers, check your air filter first. If the filter is clean, the culprit may be a slipping fan belt, a failing blower motor, or dirty evaporator coils. - Strange Smells: A musty, damp odor (often called "dirty sock syndrome") usually points to mold or bacteria growth on your indoor evaporator coil or standing water in your condensate drain pan. A burning smell indicates electrical component strain or motor failure. - Short Cycling: If your air conditioner turns on and off rapidly every few minutes without completing a full cooling cycle, it is putting massive strain on the compressor. This can be caused by an oversized system, low refrigerant, or a malfunctioning thermostat.
To help you distinguish between normal operation and a system in distress, refer to this handy comparison table:
| Sound / Sign | What is Normal? | What is a Warning Sign? (Call a Professional) | | --- | --- | --- | | System Startup | A single clicking sound as the relays engage, followed by a gentle, steady hum. | Loud clanking, persistent clicking, metal-on-metal screeching, or hard thumping. | | Airflow Noise | A steady, quiet whoosh of air moving through the registers. | Whistling, rattling, or a loud roaring sound indicating severe restriction or duct damage. | | Outdoor Unit | Steady fan rotation with a consistent hum from the compressor motor. | Grinding, buzzing, or hissing sounds (which often point to a refrigerant leak). | | Water Drainage | Small, steady drips of water from your outdoor condensate drain line while running. | Water pooling around your indoor furnace/air handler closet, indicating a clogged drain line. |
Frequently Asked Questions About Spring HVAC Prep
When is the best time to switch from heating to cooling?
The ideal time to transition your system is when local daytime high temperatures consistently reach the mid-70s to low 80s, and nighttime lows stay above 50°F. In Colorado, we recommend following the "70/60 Rule" as a general guideline: once daytime highs are regularly in the 70s and nights don't drop below 60°F indoors, you can safely make the permanent switch to cooling.
Avoid switching back and forth between heating and cooling modes multiple times in a single day during spring temperature swings, as this can strain your system's compressor.
How often should I replace my home's air filter?
As a general rule, replace standard 1-inch to 3-inch pleated filters every 30 to 90 days. However, your ideal schedule depends on your household dynamics. If you have pets, suffer from spring allergies, or live in a dusty area of Thornton or Northglenn, you should inspect your filter every 30 days. Homes without pets or high dust levels can typically wait up to 90 days.
Can I clean my outdoor AC unit myself?
Yes! Homeowners can safely perform basic exterior maintenance on their outdoor unit. This includes clearing away leaves, trimming nearby shrubs to maintain a 2-foot clearance, and gently rinsing the outer grates with a standard garden hose.
However, you should never attempt to open the electrical cabinet, spray water directly into electrical components, or use harsh chemical coil cleaners yourself. These tasks, along with checking refrigerant pressures and electrical health, require professional expertise.
Conclusion
Taking a proactive approach to preparing your hvac for the transition to cooling is the single best way to protect your comfort, lower your monthly utility bills, and extend the lifespan of your cooling system. A few simple DIY steps combined with a professional seasonal tune-up will keep your home cool and comfortable all summer long.
Quality Heating and Air is proud to be your trusted, locally owned HVAC partner in Thornton, Northglenn, Westminster, and the surrounding Denver metro communities. We treat every home we service like our own, offering honest communication, transparent pricing, and dependable workmanship.
Are you looking to ensure your home stays perfectly cool this summer? Contact us today to schedule your comprehensive spring AC tune-up, or learn more about keeping your system running smoothly year-round with Quality Heating and Air Furnace Maintenance Westminster CO.

Testimonials
Neighbors trust Quality Heating & Air for honest work and fair pricing.
Service Areas