Mini-Split Installation in Thornton, CO

Mini-Split Installation in Thornton, CO
Mini-split installation in Thornton, CO is an efficient, flexible way to heat and cool individual rooms or whole homes without the disruption of ductwork. For Thornton homeowners dealing with hot summer afternoons, cold winter snaps, or rooms that never seem to reach the right temperature, a properly designed and installed ductless mini-split delivers consistent comfort, lower operating costs, and precise zoning control.
Why a mini-split makes sense for Thornton homes
- Thornton’s climate swings from warm, dry summers to chilly winters. Mini-splits offer both efficient cooling and heat-pump heating that performs well in moderate Colorado winters.
- Many Thornton homes have additions, converted garages, or rooms where extending ductwork is impractical. A mini-split provides targeted comfort with minimal construction.
- Energy savings and zoning control reduce wasted conditioning in unused rooms, which can be valuable given local energy costs and the desire for eco-friendly solutions.
- Higher elevation and lower air density in the Denver metro area can affect equipment sizing and performance. That makes accurate load calculations and experienced installation essential.
Common mini-split configurations for Thornton residences
- Single-zone mini-splits: Ideal for a single room, basement, garage conversion, or an addition. Compact indoor heads and one outdoor compressor make these cost-effective for focused comfort.
- Multi-zone mini-splits: One outdoor unit supports multiple indoor heads (2–8+), allowing different rooms to be independently controlled. Best for whole-home retrofit or multi-room comfort without ductwork.
- Low-temperature heat pumps: If winter heating is a priority, cold-climate mini-splits designed to provide efficient heat in lower temperatures are a good option for Thornton properties that experience prolonged cold snaps.
- Cassette, wall-mounted, floor-mounted and ducted concealed indoor units: Choice depends on aesthetics, wall space, and airflow requirements.
Typical problems a new installation solves
- Uneven temperatures between rooms or levels
- Rooms that are too hot in summer or too cold in winter
- High energy bills from conditioning unused areas
- Inability to extend central HVAC to additions or historic homes without invasive ductwork
Consultation and load calculations (step one)
A successful mini-split installation begins with a professional consultation and a Manual J style load calculation. Key actions include:
- Evaluating square footage, insulation levels, window orientation, and typical occupancy.
- Considering local factors like Thornton’s seasonal temperature range, solar gain, and elevation.
- Determining whether single-zone or multi-zone equipment matches your comfort goals and budget.Accurate sizing avoids oversized or undersized equipment, both of which reduce efficiency and comfort.
System selection: single-zone vs multi-zone
- Single-zone: Lower initial cost, simplest installation, perfect for a single problematic space.
- Multi-zone: Higher upfront investment but greater flexibility and long-term savings when multiple rooms need conditioning.Decision factors: number of rooms, desired independent control, interior layout, exterior space for the outdoor unit, and future expansion plans.
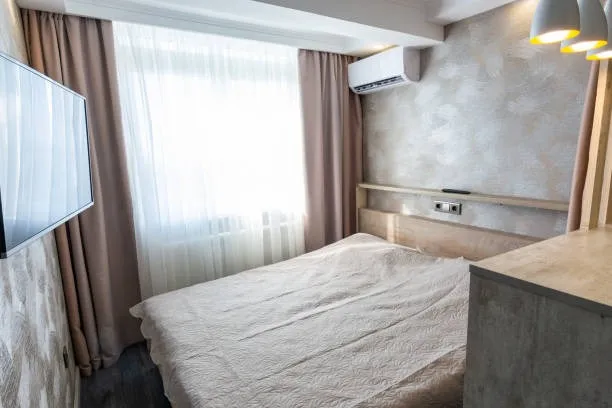
Indoor and outdoor unit placement and mounting
- Indoor units are typically mounted high on a wall for best air distribution, or optionally recessed/cassette units for a less visible install.
- Outdoor compressors need flat, ventilated pads, clearances for airflow, and sheltered positioning to reduce snow and ice exposure in winter.
- Proper placement minimizes long refrigerant runs, reduces noise transmission, and preserves the home’s exterior appearance.
Refrigerant line, condensate, and electrical work
- Refrigerant tubing, electrical wiring, and condensate drains are routed through a small 2–3 inch hole in the exterior wall. Proper sealing prevents drafts and pest entry.
- Electrical requirements include a dedicated circuit and a disconnect per local code. High-elevation and longer line sets can affect refrigerant charge and should be handled by certified technicians.
- Refrigerant handling requires EPA-certified technicians and adherence to environmental and safety regulations.
Code compliance and permits
- Local permits and inspections through the City of Thornton or the applicable municipal authority are typically required for mechanical and electrical work.
- Installers should obtain necessary permits, schedule inspections, and ensure the system meets local building and electrical codes as well as manufacturer installation requirements.
Step-by-step installation process
- Final site review and placement confirmation for indoor and outdoor units.
- Mounting indoor head(s) and installing outdoor unit pad or bracket.
- Running refrigerant lines, electrical conduit, and condensate drain; making secure wall penetrations with weatherproof seals.
- Connecting refrigerant, evacuating the lines, and charging the system according to manufacturer specifications and corrected for altitude if necessary.
- Wiring the units to the home electrical system and installing required disconnects.
- System start-up, leak testing, and performance verification through measured superheat/subcooling and airflow checks.
- Final sealing and cosmetic finishes for wall penetrations and unobtrusive line concealment.
Start-up testing and user orientation
- Technicians will perform start-up testing to confirm rated cooling and heating outputs, proper airflow, and correct refrigerant charge.
- You will receive a user orientation covering remote controls, operating modes, recommended temperature ranges for efficiency, and how to change filters and access basic settings.
- Installers should also document system settings and explain scheduling and zoning strategies to maximize comfort and reduce energy use.
Warranties and maintenance recommendations
- Manufacturer warranties typically cover parts and compressors; labor warranties vary. Confirm warranty lengths and what is required (registered installation, annual service) to maintain coverage.
- Recommended maintenance:
- Clean/replace indoor filters every 1–3 months depending on use.
- Annual professional inspection: refrigerant check, electrical connections, condensate drain cleaning, and airflow verification.
- Keep outdoor unit clear of snow, ice, and debris; provide a small shelter or raised pad in areas with heavy snow.
- Maintain 12–24 inches clearance around outdoor units for airflow.
- Regular maintenance preserves efficiency, extends equipment life, and protects warranty coverage.
Long-term benefits for Thornton homeowners
A correctly engineered and installed mini-split system delivers precise comfort, lower operating costs through zoning and inverter-driven efficiency, and minimal disruption compared with ducted retrofits. For Thornton homeowners facing temperature swings, additions, or rooms that central HVAC cannot serve well, mini-splits offer a targeted, modern solution that’s adaptable to local climate demands and elevation considerations.
If you are comparing system types or preparing for installation, prioritize accurate load calculations, certified refrigerant handling, local code compliance, and a qualified installer who will document startup settings and warranty requirements. Proper installation and routine maintenance will ensure your mini-split provides reliable, efficient comfort from day one.
Promotions
Save on seasonal system checks from a local team that treats your home like our own.

Testimonials
Neighbors trust Quality Heating & Air for honest work and fair pricing.